
Send all incoming/outgoing emails to someone as a copy using cPanel running an Exim mail server. Exim is an MTA which is installed on WHM/cPanel by default though it can be configured to use a different mail server.
Get creative with mailboxes and domains using Exim Filters.
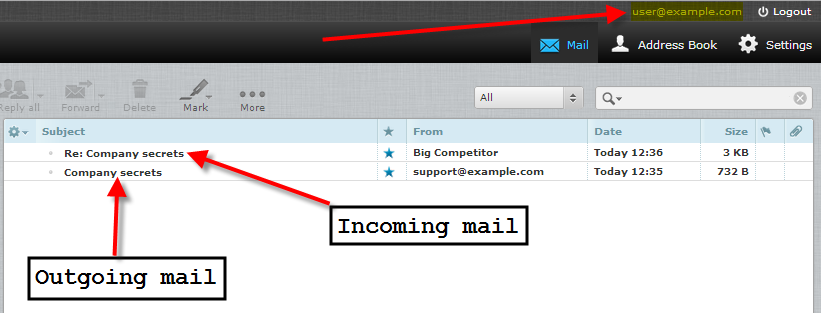
The department manager or boss of the business may want to be included on all emails that employees/staff receive on their email accounts as a copy. Most preferably a BCC so that it is hidden/unseen.
You can achieve this with cPanel and Exim filters.
There is a global Exim system filter file located at /etc/cpanel_exim_system_filter which you can make a copy of and edit and then set the new filter file to load under Exim Configuration Manager > Basic Editor > Filters > System Filter File. I don’t recommend this though, instead I recommend that you create individual filter files under /usr/local/cpanel/etc/exim/sysfilter/options/ to suit your needs.
Here are some quick and easy steps:
1. Create an Exim Filter
So go ahead and create a blank file with any name under /usr/local/cpanel/etc/exim/sysfilter/options/ on your server. Give the file a name with which you can identify with later on.
You can create as many filter files as you want to, each for a different domain or different purpose as needed.
2. Filter Incoming Emails
Add the following Exim filter code to the new, blank file you created.
It will filter all incoming emails sent with To, CC and BCC to a specific domain on the server and then send a BCC (blind carbon copy) to a specified email address.
Change domain.com and boss@domain.com to your own values as needed.
if ("$h_to:, $h_cc:, $h_bcc" contains "domain.com")
then
unseen deliver "boss@domain.com"
endif
3. Filter Outgoing Emails
Similarly as above, you can filter all outgoing emails on the server From a specific domain and send a BCC to a specific email address.
Add this code below the Exim incoming email filter in your filter file that you created.
if $sender_address: contains "domain.com"
then
unseen deliver "boss@domain.com"
endif
4. Enable the New Exim Filter File
The filter file may not be effective so you need to turn it on and restart Exim for it to work.
Go to Exim Configuration Manager > Basic Editor > Filters. Scroll down a bit where you’ll see “Custom Filter: X” where X is the name of the custom filter file you created.
Now set it to “On” and click “Save” which will save the settings and the server will automatically restart the Exim service for the changes to be effective.
The Exim system filter file scans messages that your server has received, but has not yet been delivered. To add custom filter rules to your Exim configuration, you may either create custom filter rule files for Exim to include in its configuration, or create a custom Exim system filter file. How to create a custom filter rule file To create a custom filter rule file: Create a file in the /usr/local/cpanel/etc/exim/sysfilter/options/ directory. Within that file, enter your custom filter rules. In WHM, navig
Source: Customize the Exim System Filter File – Documentation – cPanel Documentation


Be the first to reply